Yet Another Password Reset Tutorial in Flask
Implementation of the password reset flow, with a twist.

💭 Intro
Password reset functionality - it's one of the features that exists on almost every website. It has saved me numerous times from being locked out of my accounts. I was recently tasked to add this functionality to an existing large Flask application and I was surprised to see that there weren’t many good articles covering the topic.
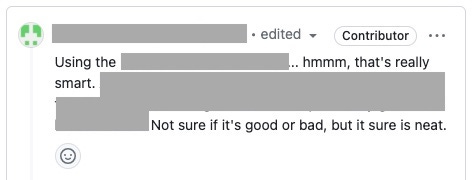
In this post I will show you my approach to implementing the password reset feature. It is done in Python with the Flask framework, but can be easily translated to other languages and frameworks. It has one neat implementation detail that I was pretty proud of at that moment. I even got this pretty positive (I guess 😂 ) comment from my colleague:
For this article I have created a very basic example app and you can check out the full code here. Examples in the article are from that app so if anything is not clear you can check it out there.
Let’s dive into it!
📜 Requirements
We have a couple of requirements. Of course, the first one is that the logged-out user is able to reset its password.
Second one is that you can’t use the same password reset link multiple times. Once the password is changed that reset link shouldn’t work anymore.
And the third one is that we cannot alter the database. No new columns are allowed. Altering and updating the database adds a layer of complexity that is not necessary, so it’s better to avoid it.
In general, password reset isn’t anything new, and is present in almost any application these days. However, when combined with these requirements, coming up with a solution that is both simple and secure is a bit of a challenge.
🤖 How it’s Usually Done
Let us first take a step back and see what the password reset feature actually is.
You, as a logged-out user, click the “Forgot password?” button located on the login page. It redirects you to a page that requires you to enter your email. After entering your email address you get an email with the password reset link inside. That link usually contains some kind of a long token of random characters.
When you click that link you get redirected to a page where you can change your password. Once you change your password and everything works you can finally login back to your account (on Substack for example, and subscribe to my newsletter 🙌🏻 ).
If you are using Django you get all of these things almost for free. All you need to do is to wire up their password reset class based views (most notably PasswordResetView, but also few others) and create templates for those views. You even get the email sending with it, if you set it up with an actual SMTP server. All the requirements would be covered.
But, if you are not using Django you are left to implement this on your own.
For the most part the password reset flow is standardised and these are the things you will need to do:
Create a simple page with a form that asks the user to enter their email address.
On entering the email, if the email address is present in the system, generate a URL with a special token.
Send that URL via email to the entered email address.
Create a method that checks the token from the generated URL and shows a simple form to enter a new password.
Create a method that checks the token again and saves the new password.
If everything went well, show the user a simple page with a success message.
I will show you one neat detail on step 2 that will make this tutorial a bit different than other password reset tutorials. It will enable us to fulfil one of the feature requirements without exposing too much information in the generated URL.
👨🏻💻 Little less conversation, little more action, please
Okay, enough with the talk, let’s implement this stuff! As I’ve mentioned before, you can find all the code here!
📨 Steps 1 - 3: Requesting a password reset and sending the email
First let’s create a simple form to input email to send the reset password URL to. We are using Flask-WTF library so it is pretty simple:
It only contains one email input field and a submit button.
We now want to create a page that shows this simple form to the user and handle its submission. We will do that using one endpoint:
on a GET request it will show this empty form to the user
on a POST request it will check the email address and send a reset password email to that email address
Here is the code:
Quick side note: We are using the Flask-Login package for user session management so we have the current_user object available in our code.
Let’s go step by step and see what is happening in the code above.
If the current_user is authenticated we are redirecting it to the home page (main.index), as the logged-in user shouldn’t use this endpoint.
We then create the instance of the ResetPasswordRequestForm form and check if the form has been submitted.
The statement form.validate_on_submit() will be True only if the form is submitted and there are no errors in the input data.
If we are just opening the page there will be no submitted data so we skip the if block. In that case we return the rendered template with an empty form.
When the user submits the email address on this page the code enters the if form.validate_on_submit() condition block. It then checks if the user exists in our database. If it exists we send the reset password email and we show the appropriate message.
The meaningful part of the template that is rendered here is this:
To send the reset password email the send_reset_password_email(user) does few things:
it creates the reset password URL with the special token
it creates an email message that contains that URL
it sends the email message to the user
We are using the Flask-Mailman package for email sending. Note that it requires some additional configuration settings that are not shown here.
We need to add this to the app/auth/routes.py file:
We create the reset password URL using Flask’s url_for method and generate_reset_password_token method of the User model that we will show a bit later.
The generated url is in the form of <host>/reset_password/<token>/<user_id>.
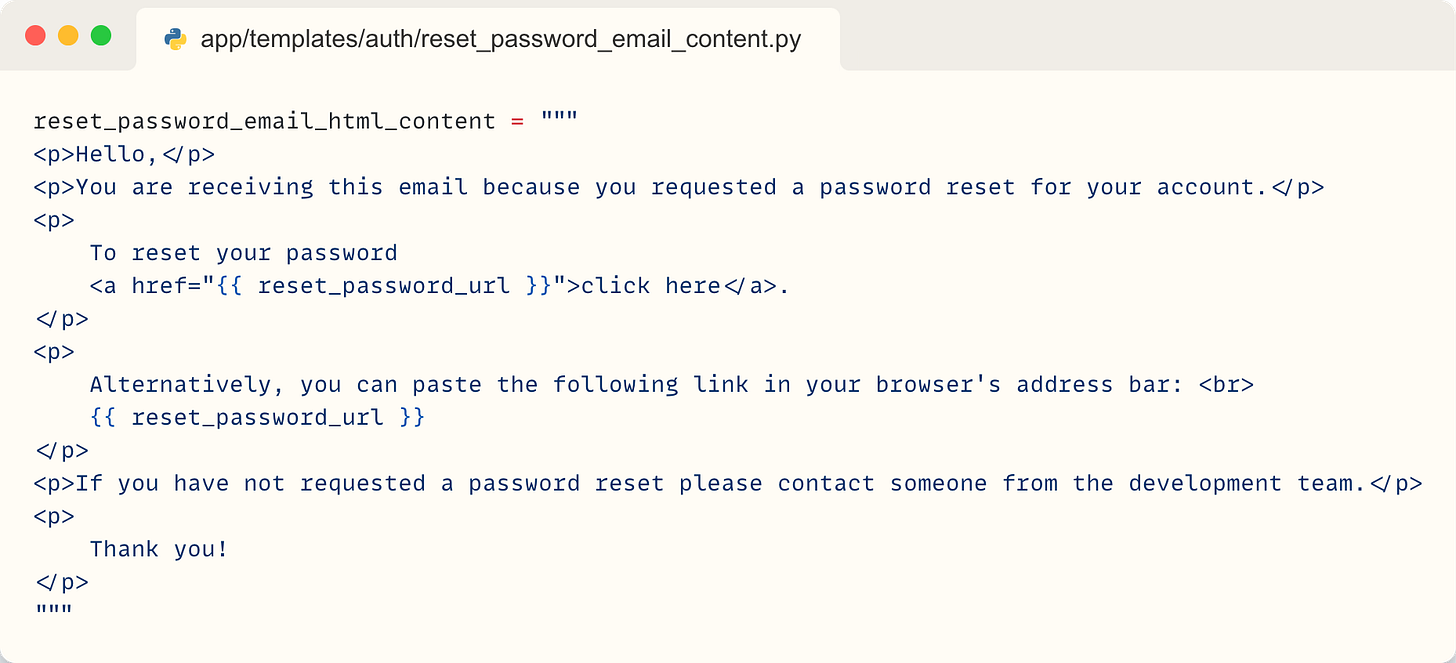
The reset_password_email_html_content is a HTML formatted template for the email message. It is in a separate file so we don’t clutter the code here.
It looks something like this:
render_template_string populates this template string with the generated URL. When the email_body is rendered we create the EmailMessage and send it out to the user.
The user.generate_reset_password_token looks like this:
We are using the URLSafeTimedSerializer from the ItsDangerous library that creates a timed token from the user’s email that is safe to use as a part of an URL.
Here we have the interesting implementation detail that I announced in the introduction. We are using the current password hash of a user as a salt when serializing the token.
What is salt? The salt is a string that is combined with the secret key to create a unique token. Knowing both the secret key and the salt is necessary to properly validate the token.
This is handy because the password hash will be changed as soon as the user changes its password. That will make the token invalid to use again. This fulfils one of the requirements mentioned at the beginning of the article - that the token can’t be used multiple times. This is the detail from the introduction that got me that comment from my colleague:
🔐 Steps 4 - 6: Creating a new password
Okay, so the user has requested to reset their password and we have sent out an email with the special URL. When clicked, this link redirects you to a page where you can change your password. As before, we need two things:
simple form that will receive new password data
endpoint that will handle showing and processing of that form
Form is simple, two fields - new password and a repeat password field for confirmation, and a submit button.
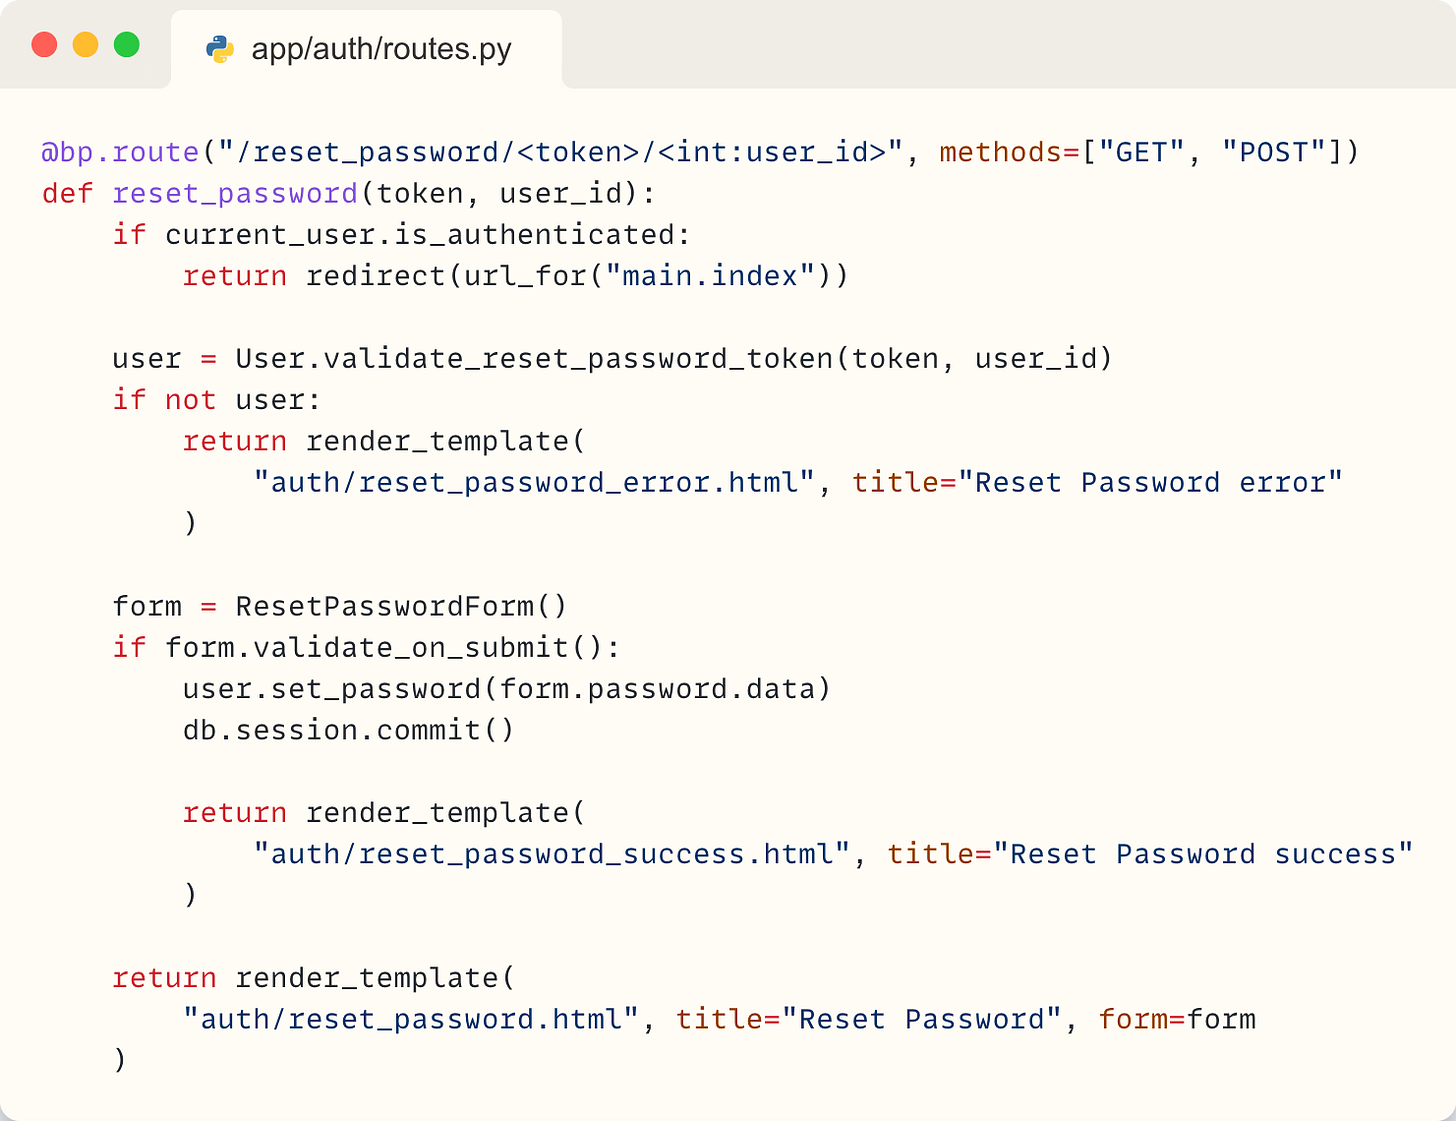
One endpoint will both show the page with the form (on GET requests) and process the form when submitted (on POST requests).
As before, this endpoint is not meant to be accessed by logged-in users so we redirect them.
We then validate the token sent in the URL. The User.validate_reset_password_token method checks the token. If it is valid it returns the user related to it. If the token is not valid it will return None and show the error message. Exact implementation of User.validate_reset_password_token will be shown a bit later.
We then create an instance of the ResetPasswordForm form and check if the data has been submitted. If the user has opened the page and hasn’t submitted any data, the form.validate_on_submit() is False. In that case we skip to the last line - where the template is rendered and returned to the user. The template is just the ResetPasswordForm form.
When the user submits the new password in the ResetPasswordForm form and the data is valid, the form.validate_on_submit() will be True. We then set the new password, commit it to the database and return the success message.
Only thing left to show is the validate_reset_password_token(token, user_id) method of the User model. Here is the implementation:
We try to fetch the user from the database using the user_id provided in the URL from the password reset email.
If the user exists in the database we try to deserialize the token. The code checks that the token hasn’t been changed along the way. It also checks if the signature of the token has expired. Both are important - for security reasons we don’t want our tokens to be tampered with nor active for too long.
As previously mentioned, we are using the user’s current password hash to validate the token.
If everything went well we extract the user’s email that was serialised in the token. We use it to check if it matches with the email loaded from the database. That is an extra security and data integrity check. Finally, if that matches, we return the user object.
And that’s it! We should have the fully functioning password reset feature! 🥳
For all the missing implementation details feel free to check out the example app here.
🚀 Conclusion
This is only one idea how to implement the password reset feature in your app. There are of course other valid ways, for example by generating random tokens and storing them in the database.
Also, there are a lot of ways that this code can be improved. One thing that comes to mind is to make the email sending asynchronous. That way it wouldn’t block the request and the user would receive the response a bit faster.
Can you think of any other improvements you would add to this? Feel free to comment below. Also, any feedback would be much appreciated, thank you! 🙏🏻


